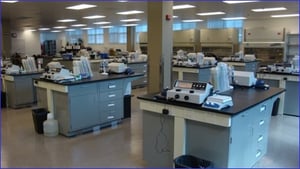
 Congratulations, your hard work and the powers that be have allowed you to start a biotech program and set up your very own biotechnology teaching lab. Where do you even begin?
This blog is designed to give you a brief overview of the key areas to consider when setting up a biotech teaching lab. The key areas that we will focus on are:
- Lay-out/Workflow/Storage
- Lab Stations
- Common Work Areas
- Chemicals/Chemical Storage
- Refrigerator/Freezer Storage
- Student Sample Storage
- Waste Disposal
- Other Safety Issues
- Other Issues
Layout/Workflow/Storage
The layout and workflow of your biotech lab must be carefully planned to ensure efficiency during biotech workshops. You must consider student movement and bottlenecks during the biotech workshops and how these will affect time constraints.
Ensure that you set up individual lab stations for students to work together and, if required, common work areas for shared equipment and reagents. Remember, these common areas are likely to cause the bottlenecks. If possible, and if resources and space allow, replicate work areas to avoid long waits and “long distances.”
For improved efficiency, strategically place tables and carts around the lab space with commonly used reagents and consumables and have extra deionized water near the sinks.
For safety, consider placement of gas and Bunsen burners, if possible, in appropriate fume hoods.
Finally, ensure that you have adequate immediate, short-and long-term storage areas. You will need storage for 4°C and -20°C items, so a fridge and freezer will be required.
Student Lab Stations
In a typical biotech teaching lab, students work as lab partners, in pairs to groups of four, or 2 sets of lab partners. Each group of four will share a lab table, bench, or workstation that should be equipped, at a minimum, with:
- 1 hot plate stirrer
- 1 spectrophotometer
- 1 trash bucket
- 1 (serological) pipet rack
- 1 micropipette stand
- 1 box of gloves/table
Additionally, make use of the drawers and cabinets of the lab benches and store the following at each station:
- Small instrument drawer containing pipette pumps, micropipette tips, pen, tape, scissors, goggles, etc.
- Student storage drawer
- Small equipment and reagent cabinet containing gel boxes, power supplies, large volumes of buffer, etc.
Common Work Areas
The common work areas will be used for communal reagents and equipment, if feasible, replicate common work areas to avoid delays and bottlenecks. In strategic locations, set up common work stations featuring the following, when applicable:
- Electronic and analytical weighing stations
- pH meter/pH adjustment buffers
- Centrifuges
- UV spectrometer station
- Refrigerators and freezers
- Gel staining and visualization station
- Incubation ovens, water baths, heat blocks, microwaves
- Deionized water (dH20)
- Autoclaves and drying ovens
Other common areas to have in your biotech teaching lab are hoods. You will need to consider the type of hoods you require. Either laminar flow hoods and/or biosafety cabinets for sterile work, protect user and samples and/or chemical fume hoods for dispensing organics, caustics, flammables, and noxious reagents.
Chemicals and Chemical Storage
Chemicals must be stored to protect user and reagents, and you must be familiar with your district’s specific policies on chemical storage. As a general guideline, the following must be considered:
- Chemical storeroom/chemical cabinet for general safe chemicals. Use a green label.
- Flammable cabinet for flammable liquids, such as alcohols. Use a red label.
- Oxidizers and corrosive cabinet for bases, acids, and peroxides. Label cabinet with a yellow or white label.
- A locked cabinet for toxics, such as ethidium bromide; use a blue label.
In addition to these storage locations, ensure you have access to a built-in or portable chemical fume hood and plenty of latex and nitrile gloves and safety goggles.
Refrigerator & Freezer Storage
Many reagents used in biotechnology labs require cold storage due to their sensitivity to temperature; these include proteins (enzymes), DNA, and cell and tissue samples. When ordered commercially, these temperature sensitive reagents will be clearly labeled. In some cases, a kit or box may have items that have different storage temperatures, so check each item carefully.
For easy access to these stored items make sure that you:
- Store items alphabetically.
- Record the date on reagents upon arrival and when the item is first opened.
- Do not use defrosting (cycling) fridges and freezers.
- Repeated freezing/thawing compromises most samples (aliquot samples on receipt into more usable volumes, if necessary).
Waste Disposal
Another area to consider is waste disposal and, similar to chemical storage, is region specific. Make sure you are aware of your district’s, municipality’s, and state’s disposal guidelines. Here are some general waste disposal guidelines:
- Most hazardous waste must be collected and disposed of by professionals.
- Use biohazard bags for biological hazards = plates (no sharp items), fill only ½ full.
- Autoclave bio-contaminated items 15-20 mins @15-20 psi before trash.
- Bio-contaminated loops and tubes can be soaked in 10% bleach for 30 mins. before regular trash.
- Many chemicals should not go down the drain (see district rules), i.e. CuSO4, silver nitrate, etc.
- Label waste with type/concentration/date.
Other Safety Issues
Finally, some simple safety guidelines to follow to protect yourself and the students:
- Have gloves and goggles at every lab station and workstation for all chemical work.
- No gloves for work with Bunsen burner or microwave (burn hazard). Explore silicon gloves.
- Use hot hand protectors or lab mitts for hot bottles/beakers.
- Disinfectants at each hood (1x Lysol® or Amphyl®), where bacteria is used.
- Use of 10% bleach or 70% EtOH where plant tissues are used.
- Use of lid-locks for 1.7 mL tubes and hot heat blocks.
- Safety shower, eyewash.
- Broken glass cartons and fire extinguishers in several places.
Other Issues
Some final tips for your biotech lab:
- Computers – keep them away from chemicals and water.
- Not enough space, then explore portable items.
- Alphabetized small items drawers or containers.
- Cable-lock down balances, computers, and expensive equipment.
- Designated hand-washing sinks.
- Lots of paper towels used.
- Crushed ice needed/preferred.
- Post emergency numbers.
How to Begin Your Biotech Program
It may seem overwhelming, but there is a lot of support and readily available tools to help you add biotech to your existing syllabus today. G-Biosciences offers Plug-n-Play hands-on teaching kits, as well as Ellyn Daugherty’s and other educational programs and support. Our goal is to make it easier to implement biotechnology into your classroom. Please reach out to G-Biosciences if you need assistance getting started.
Adapted with kind permission from Ellyn Daugherty


